Homemade beer
Two styles, four flavours
During Christmas, I read a great book about the fungi kingdom and how it impacts the world we know. The book Entangled Life: How Fungi Make Our Worlds, Change Our Minds and Shape Our Futures was incredibly detailed for a pop science book. One of the last chapters was about yeast. It’s nothing new to me that I can use them to make bread, but the book went into much more detail about their usage and all the fermentation processes. It mentioned their usage in beverage making. I decided it was time for another adventure and to make my own beer. Or almost my own beer, as I decided to go with ready-made malt mash in brewkits.
I went for two types of beer. One ale style beer and one lager. My girlfriend helped me with the process during the first preparation of the wort. Because two batches of 40 bottles of exactly the same beer would be too boring, I wanted to go a little further. A typical batch of around 20-23 litres I split into around two 10 litres parts. For the ale, I decided to go with a plain bitter ale and another with lemon and mint. For the lager, my initial plan was to go with either plain or a jasmine and herbal style but finally pivoted to herbal based extra flavours.
I started by choosing the right brewkit - compared online to instant soups, but for beer and according to the reviews incredible difficult to go wrong. Then for my very first beer, it was great choice. I’m not calling myself a brewer, and what I wanted was to make my first batch of beer. A brewkit is essentially a hopped malt extract concentrate. Almost all I could find were 1.7 kg tins of syrup. They are pre-made from grains of malt and pre-boiled with hops into the form of a concentrated syrup to mix with water. For the ale, I wanted something super refreshing, so I chose a California Blonde Ale with a clear amber-gold look, light and crisp. For the lager, I chose a classic Coopers Lager - a light Australian malt beer. Ale and lager are two different styles. They also differ in the type of yeast used to ferment the wort. For ale, you typically go with warm fermentation around 15-22°C. For lager, much lower 10-15°C. Both brewkits come with sachets of proper yeasts, but according to internet discussions, they are low quality and may stop suddenly during fermentation. So I searched for higher-quality yeasts and found out that the gold standard in the home-brewing or craft industry is yeast by Fermentis. I bought SafAle US-05 for a clean and crisp taste for the refreshing ale I was making, and SafLager W-34/70 for a neutral, classic lager. At this point, I made my first mistake and initially bought just one pack of each yeast. More about that later. Yeast needs material to ferment and increase the target gravity (amount of alcohol in the final product). I chose superlight and light Gozdawa malt extract concentrates. Regarding the finishing touch, after fermentation and during bottling, it’s time for a second round called refermentation. From what I learned, you can go with either plain sugar or an extra portion of dry malt extract for refermentation when bottling. Not only does this make the beer sparkling and produce a white, smooth foam thanks to malt proteins, but it also provides fullness to the beer. Plain sugar could have different advantage of fermenting clearly and predictable. During primary fermentation regular sugar often results in a watery, thin product. Because it was my debut beer, it was an obvious choice to go with DME. The water I used was spring water from the shop. To add extra flavour, I also went for dry hopping with Oktawia, a Polish hop.
Regarding typical ingredients, that was mostly it. To clean up everything, I used Oxi (sodium percarbonate) and boiling water. My buckets were 30-litre specialised ones. In my opinion, not worth the price. For a third of the price, I could have bought a regular bucket made from food-grade contact plastic and drilled the holes on my own. Besides the fermentation bucket, I used an airlock to check whether fermentation was still going or whether everything was already steady, and a mounted tap for filling bottles without disturbing the sediment and for taking gravity samples. My homemade beer-making starter kit also had a hydrometer to check whether the wort was ready to bottle and to avoid bottle grenades - bottles exploding due to CO2 pressure because fermentation was still ongoing inside them. A liquid crystal thermometer - a thin strip stuck to the outside of the bucket - told me the temperature inside. A stirrer was used to mix everything together. Bottles and caps - obvious. I bought some new glass bottles and collected some more from my friends (of course properly cleaned before reusing). I learnt that the brown colour is not random. It’s to protect the beer from light. A capper, kitchen scales, and a bottle brush were also useful.
The process was quite easy, as expected for a brewkit. First, I cleaned everything thoroughly. Then I heated the brewkit and malt extract so they flowed more smoothly out of the tin. In the meantime, I rehydrated the yeast to gently “wake them up” before pouring them into the wort. Then I mixed the brewkit concentrate with water and added the malt extract. I filled it to 23 litres and stirred vigorously. I took a sample to measure the initial gravity. Then I added the rehydrated and gently stirred yeast to the wort. Some people skip the rehydration process, but my sources - including a barman with a food processing qualification specialising in brewing - told me to rehydrate. Mostly done. Now came the hardest part for me. I had to wait 2 or 3 weeks for the initial results. Or at least that was the plan. Oh boy, how wrong I was.

After the first 3 days, I wasn’t hearing anything from the airlock. For two days I thought, okay, it needs time. But after the third day, that was suspicious. I read online that fermentation could have stopped for some reason, or that the yeast could be dead or could have been improperly stored in the past. The first piece of advice was to shake vigorously without opening the lid to wake up the yeast. But after an extra two days, still nothing happened. So I decided to buy and add a second pack of yeast. I did exactly the same ritual as before. But first, to make sure it was not a problem with the bucket, I taped the sides to prevent any air leaks and waited to check if finally bubbles or BLG lowered. The problem persisted so I added a second pack of yeast. After less than a day, it started fermenting again! I could hear bubbles coming out of the airlock. My initial plan was to prepare the wort in 2 weeks, then bottle it, wait one more week, and give it to my girlfriend for Valentine’s Day. I didn’t know it was not realist already. But anyway not only did the fermentation problem happen, but as it had trouble starting, after 3 weeks it was still fermenting. At this time, I had a ski trip and a few other events, so I decided I would focus on everything else, even if it took much longer. I decided it was the proper moment to add the hops. After 4.5 weeks, the bubbles stopped. The BLG was stable. I took it outside to the lower winter temperature for a cold crash. The beer was ready for bottling.
My girlfriend and I cleaned up 40 bottles for the ale and poured the beer into them. The night before, I had prepared cold concentrates of verbena, lemongrass, orange tea, lemon tea, and mint tea. I went for teas and not juices because fructose could potentially restart fermentation and produce bottle grenades and I would have to keep this in mind during refermentation when adding DME. Cold concentrates to avoid bitterness. You know the flavour when tea goes cold and sits around for the whole day. We wanted to avoid that and extract the pure flavours of the ingredients. We dosed the extracts with a syringe. Around 15 ml into each bottle. My girlfriend chose lemongrass, mint, and lemon tea. We added DME to each bottle. We were freaked out by the idea of bottle grenades and added around 2 g of it to each bottle. Now I know it was too little. Not only do you need to add more DME than you would sugar (usually around 3-4 g per 500 ml bottle), but even for the sugar equivalent, we added too little. At least it was safe. A few days later, I did the same with the lager. But for flavours, I went with cannabis CBD, verbena, and jasmine. The other part of the batch was plain lager. Again, we left the beer for a few weeks. In the meantime, at one of the charity events, I met a guy who was at a much higher level of beer-making. He gave me a lot of great tips, and I was spamming him on online chats for advice.
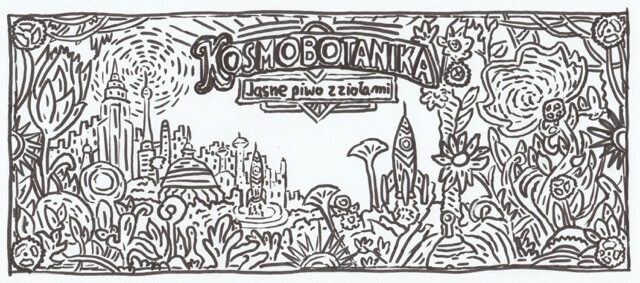
While waiting for the bottles, I prepared label designs. My first idea was to sketch them with a pencil on paper and then use Gemini to digitalise them into a printable format, and finally add an overlay with all the information using Affinity Designer 2. One of my friends - a digital graphic artist - like most artistic people I know, is allergic to AI-generated images. I understand this, as I can’t stand the often low-quality code produced by naive implementations of SOTA LLM models. There is also second, ethical concern. So instead, I took another approach and bought a set of markers and a watercolour paint palette, and made them by hand. At this point, I also decided I would go with two different labels and beer names. After making the outlines using markers, I scanned the paper to make sure I had backups in case I made some mistakes painting them later. It was a good idea. I made some mistakes with the watercolour and needed to go back and use GIMP and Affinity Designer 2 to alter the final look of the labels. After one day of intense work on the labels, I was satisfied with the results. I searched for a printing company and asked about labels. They estimated the price of 80 labels at around 85 euros! That’s a lot. So instead, I asked for premium paper and decided I could glue them on using double-sided tape. It cost around one third as much. That was manageable.
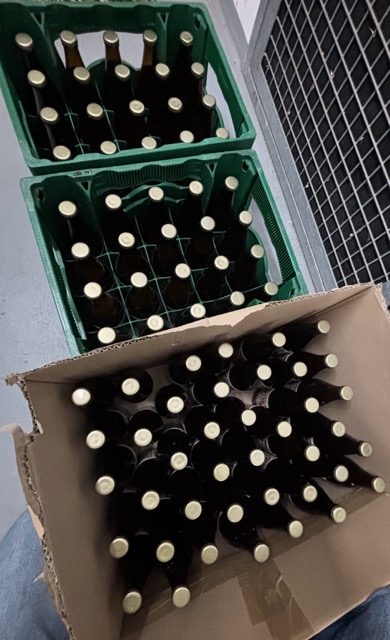
Three weeks later, the bottles were ready to be labelled. We spent around four hours cutting, gluing, and positioning labels on each bottle. We poured an extra portion of each beer into a plastic bottle to keep an eye on the amount of CO2 produced in the bottle, as you can easily squeeze a plastic bottle and feel how much gas is inside. At this point, we opened the first virgin bottles and drank them. The beer tasted great! And the different flavours were distinct. It took around two months in total to make two batches of beer in four different flavours. Now, with the basement filled with beer, we invited friends and family to parties to taste it and spend time together. It was indeed an interesting adventure, and I already know I will try again when my basement has some space again. Maybe cider or wine will be next?